Interesting.
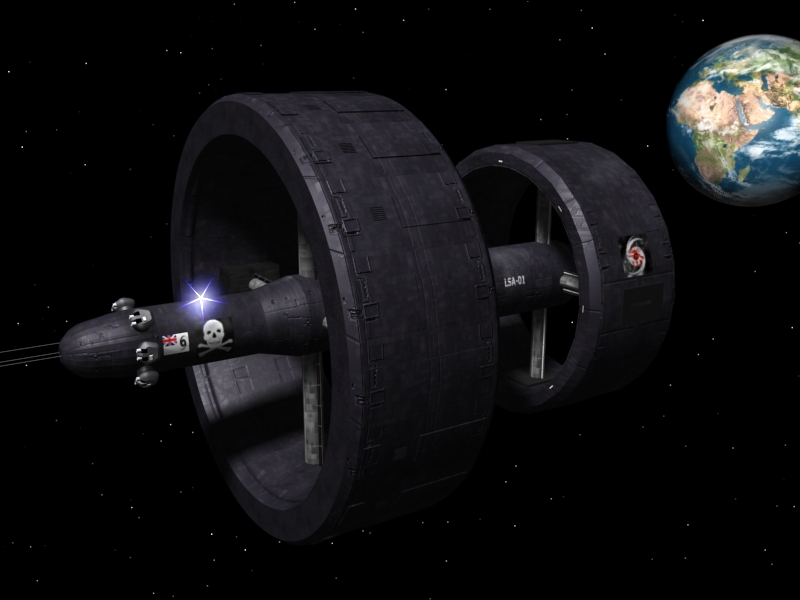
Speaking of textures, how is that wheel station texture coming, Ryder?
I'd really like to get this in-game soon, I suppose I could try a makeshift solid-color texture myself if it's going to take a while.
Elite Strike pre-release patch!
Moderators: Omega, tillias, Mod Contributor
-
Halleck
- Elite

- Posts: 1832
- Joined: Sat Jan 15, 2005 10:21 pm
- Location: State of Denial
- Contact:

-
chuck_starchaser
- Elite
- Posts: 8014
- Joined: Fri Sep 05, 2003 4:03 am
- Location: Montreal
- Contact:
I could texture it; I just haven't plunged into learning the art and magic of unwrapping... Maybe it's time to grab a tutorial and learn how to do it...
Latest version of Cinemut Opaque
Latest version of LaGrande noodleworks (scroll down).
An evolving La Grande How-To...
The non-working, but latest, CineMut test_bike
PU (Privateer: Parallel Universe's Home). WC or Privateer Drayman for you?
WCpedia --The Wing Commander Encyclopedia-- From Angel Deveraux through Belisarius to Zachary Banfeld...
WC Nexus forum, the Moonbase Tycho of WC fans.
-
klauss
- Elite
- Posts: 7243
- Joined: Mon Apr 18, 2005 2:40 pm
- Location: LS87, Buenos Aires, República Argentina
-
Halleck
- Elite
- Posts: 1832
- Joined: Sat Jan 15, 2005 10:21 pm
- Location: State of Denial
- Contact:
-
chuck_starchaser
- Elite
- Posts: 8014
- Joined: Fri Sep 05, 2003 4:03 am
- Location: Montreal
- Contact:
I just read a tutorial that Zeog had recommended me. Seems straightforward enough for a cube... 
Well, I was also checking out some threads at Elysium and someone was recommending to group related things you want to texture together by materials, so that you go in and out between edit mode and uv-mapping mode, selecting all facets of a same material each time and unwrapping them together. Makes sense to me, except I'm not sure what happens later, like whether those materials are for keepers or can be rejoined into one.
I hate materials.
And what I can't find anywhere is how one maps more than one facet to the same region in the texture. Like the windows, which can be mirrored and repeated, for efficiency. Haven't found a tutorial that even mentions such issues. For my cargo ship, in fact, I want to have tons of tiling textures in the living area. Like floor and bathroom tiles, carpeting, seat upholstery. But then again, if the textures tile (and I haven't seen a tutorial mentioning tiling textures), what happens then with radiosity baking? Obviously more than one uv-mapping is needed... Anyways, maybe the first thing I should do is get my hands dirty and try it out with the little I know.
Latest version of Cinemut Opaque
Latest version of LaGrande noodleworks (scroll down).
An evolving La Grande How-To...
The non-working, but latest, CineMut test_bike
PU (Privateer: Parallel Universe's Home). WC or Privateer Drayman for you?
WCpedia --The Wing Commander Encyclopedia-- From Angel Deveraux through Belisarius to Zachary Banfeld...
WC Nexus forum, the Moonbase Tycho of WC fans.
Latest version of LaGrande noodleworks (scroll down).
An evolving La Grande How-To...
The non-working, but latest, CineMut test_bike
PU (Privateer: Parallel Universe's Home). WC or Privateer Drayman for you?
WCpedia --The Wing Commander Encyclopedia-- From Angel Deveraux through Belisarius to Zachary Banfeld...
WC Nexus forum, the Moonbase Tycho of WC fans.
-
Zeog
- ISO Party Member

- Posts: 453
- Joined: Fri Jun 03, 2005 10:30 am
- Location: Europe
For your convenience: a simple UV mapping and texturing tutorial for blender (found via Blender tutorials section).
Set up for Unwrapping/Texturing
Split your screen, so that one shows the 3D-view and the other one the UV/Image editor. Load your texture into the UV-window. Now in the 3D window select the Mode: "UV Face Select". Your model now appears white with grey edges. Now you're ready to unwrap.
Unwrapping Single Faces or Small Plane Groups of Faces
(Note: for unwrapping large or complex groups of faces that are not in one plane you need to apply seams in order to avoid distortion -- that's shown in the tutorial I linked)
Select the face you want to texture in the 3D-view (right click on it). You may add further ones to your selection by holding Ctrl and right-clicking them.
Now move you mouse over to the UV screen and hit the E-key, confirm the "LSCM unwrap?" and there it is. You'll see all selected faces neatly flat on your texture. You can now arrange, rotate, scale them. You may even position the corners of your polygons to pixel accuracy by selecting and moving them separately. You may move all ship windows faces to the same spot to let them all use the same area of the texture.
Hit Alt+Z in the 3D-view to see the texture live on your model.
Here it is:chuck wrote:And what I can't find anywhere is how one maps more than one facet to the same region in the texture.
Set up for Unwrapping/Texturing
Split your screen, so that one shows the 3D-view and the other one the UV/Image editor. Load your texture into the UV-window. Now in the 3D window select the Mode: "UV Face Select". Your model now appears white with grey edges. Now you're ready to unwrap.
Unwrapping Single Faces or Small Plane Groups of Faces
(Note: for unwrapping large or complex groups of faces that are not in one plane you need to apply seams in order to avoid distortion -- that's shown in the tutorial I linked)
Select the face you want to texture in the 3D-view (right click on it). You may add further ones to your selection by holding Ctrl and right-clicking them.
Now move you mouse over to the UV screen and hit the E-key, confirm the "LSCM unwrap?" and there it is. You'll see all selected faces neatly flat on your texture. You can now arrange, rotate, scale them. You may even position the corners of your polygons to pixel accuracy by selecting and moving them separately. You may move all ship windows faces to the same spot to let them all use the same area of the texture.
Hit Alt+Z in the 3D-view to see the texture live on your model.
-
klauss
- Elite
- Posts: 7243
- Joined: Mon Apr 18, 2005 2:40 pm
- Location: LS87, Buenos Aires, República Argentina
Tiling:
When you're placing the tris on the uv-mapping window, the one with the texture as a background, if you exceed the textured region (get outside the texture), coordinates take values above [0,1]. Blender does not show what happens... normally... because it depends on a lot of stuff (in blender, of material settings... ingame, of texture unit settings). But in most cases (it's even the default in blender materials, I think), it usually tiles.
That is, if you have a square quad occupying the entire image, and stretch it horizontally so it's 10 times the image's width, you'll have the quad textured with a 10-times-tiled (horizontally) texture.
I hope it's clear.
About radiosity baking + tiling: you're screwed. You'd have to use multiple coordinate sets... but AFAIK, Blender doesn't support them yet. It's in the To-Do, I think.
-
chuck_starchaser
- Elite
- Posts: 8014
- Joined: Fri Sep 05, 2003 4:03 am
- Location: Montreal
- Contact:
Great! Thanks again, Zeog. That sounds even easy.
Klauss, thank you too. But question: that tiling trick I knew, but it would force me to use a separate texture for each tiling texture.
I suppose I could subdivide a square region, say the seat of a wicker chair, into many small rectangles, and then mark seam at all subdivisions and uv-map each rectangle to the same texture tile, I suppose? Not sure how this would work.
Should work; but it would have to line up with pixel rows and columns that are multiples of its side dimensions, I guess... For mipmapping and filtering considerations..
And, do you know which software supports dual uv mappings, if Blender doesn't?
Latest version of Cinemut Opaque
Latest version of LaGrande noodleworks (scroll down).
An evolving La Grande How-To...
The non-working, but latest, CineMut test_bike
PU (Privateer: Parallel Universe's Home). WC or Privateer Drayman for you?
WCpedia --The Wing Commander Encyclopedia-- From Angel Deveraux through Belisarius to Zachary Banfeld...
WC Nexus forum, the Moonbase Tycho of WC fans.
Latest version of LaGrande noodleworks (scroll down).
An evolving La Grande How-To...
The non-working, but latest, CineMut test_bike
PU (Privateer: Parallel Universe's Home). WC or Privateer Drayman for you?
WCpedia --The Wing Commander Encyclopedia-- From Angel Deveraux through Belisarius to Zachary Banfeld...
WC Nexus forum, the Moonbase Tycho of WC fans.
-
klauss
- Elite
- Posts: 7243
- Joined: Mon Apr 18, 2005 2:40 pm
- Location: LS87, Buenos Aires, República Argentina
Well... that's one problem with tiling.
As you say, you have to match lots of stuff... not only uv coordinates, but also du/dx du/dy du/dz dv/dx dv/dy dv/dz (the partial derivatives - don't nitpick, I know it's not exactly that... it's even more complex, I don't want to pollute the post with the details) to avoid mipmapping seams. It's really tricky. There's only one way in which you can get away with it, I think: flat, regular surfaces. But... since it's an act of carefully matching values, it may well be possible - depending on patience and skill levels.
I could live with 2+ textures: an atlas for non-tiling stuff, another for 1D tiling stuff (things that tile in one direction but not the other), because you can stack them up, and one more for each 2D tiling texture. Needless to say... don't abuse of 2D tiling You shouldn't have to, anyway. Because if you tile too much, then you also cover a lot of surface, and thus leave less surface to be textured by other (tiling) textures. The key is not having too many textures in one model. Classic DO NOT DO THIS is the firefly
About multiple coordinate sets... I think I'll add an option in mesher to do that from multiple copies of the same model.
Like... you save one with one coordinate set in ship_tc1.obj. Another ship_tc2.obj and ship_tc3.obj. Then, type:
But I'm not sure how hard would it be... depends on how blender chooses to order the output.
Mostly because I really don't think the obj specification allows multiple coordinate sets.
There's one modelling app that I think does support them: XSI - and it has an Ogre exporter as well. But it's not free, unless you can get a trial version or something. MAX also does support them... but it's less free than XSI - and I don't know much more. That's why I was thinking about adding that option to mesher.
As you say, you have to match lots of stuff... not only uv coordinates, but also du/dx du/dy du/dz dv/dx dv/dy dv/dz (the partial derivatives - don't nitpick, I know it's not exactly that... it's even more complex, I don't want to pollute the post with the details) to avoid mipmapping seams. It's really tricky. There's only one way in which you can get away with it, I think: flat, regular surfaces. But... since it's an act of carefully matching values, it may well be possible - depending on patience and skill levels.
I could live with 2+ textures: an atlas for non-tiling stuff, another for 1D tiling stuff (things that tile in one direction but not the other), because you can stack them up, and one more for each 2D tiling texture. Needless to say... don't abuse of 2D tiling
About multiple coordinate sets... I think I'll add an option in mesher to do that from multiple copies of the same model.
Like... you save one with one coordinate set in ship_tc1.obj. Another ship_tc2.obj and ship_tc3.obj. Then, type:
Code: Select all
mesher ship_tc1.obj ship.mesh omc
mesher ship_tc2.obj ship.mesh oma -add-texcoordset
mesher ship_tc3.obj ship.mesh oma -add-texcoordset
Mostly because I really don't think the obj specification allows multiple coordinate sets.
There's one modelling app that I think does support them: XSI - and it has an Ogre exporter as well. But it's not free, unless you can get a trial version or something. MAX also does support them... but it's less free than XSI
-
chuck_starchaser
- Elite
- Posts: 8014
- Joined: Fri Sep 05, 2003 4:03 am
- Location: Montreal
- Contact:
Okay; I'll try to come up with two UV-mappings, then. Right now I can't come up with 0.01 UV-mappings, though. Man, is blender hard to learn...
Okay, the tutorial says "and now, just grab the mapped faces and rotatate them or scale them around..." but never says how. The only way I found to even select the shapes in the UV window is to select them in the 3D window and then press A to select all in the UV window, but when you select faces in the 3D window, all the other shapes in the UV window disappear rather than get greyed out, so you don't know what you're doing. On top of that, when I try to Grab, Scale or Rotate, the set of facets in the UV windows gets shattered apart...
Before pressing G:

After pressing G:

(Never mind the redness; that's a bug that occurs when you force antialiasing in the driver and try to save a window to a jpg.)
EDIT:
Figured out what was wrong: I had Quads Constrained Rectangular and Snap to Pixels turned on. Now I can rotata, scale and move, but I still can't see the previous groups when I'm placing a group...
Okay, the tutorial says "and now, just grab the mapped faces and rotatate them or scale them around..." but never says how. The only way I found to even select the shapes in the UV window is to select them in the 3D window and then press A to select all in the UV window, but when you select faces in the 3D window, all the other shapes in the UV window disappear rather than get greyed out, so you don't know what you're doing. On top of that, when I try to Grab, Scale or Rotate, the set of facets in the UV windows gets shattered apart...
Before pressing G:
After pressing G:
(Never mind the redness; that's a bug that occurs when you force antialiasing in the driver and try to save a window to a jpg.)
EDIT:
Figured out what was wrong: I had Quads Constrained Rectangular and Snap to Pixels turned on. Now I can rotata, scale and move, but I still can't see the previous groups when I'm placing a group...
Latest version of Cinemut Opaque
Latest version of LaGrande noodleworks (scroll down).
An evolving La Grande How-To...
The non-working, but latest, CineMut test_bike
PU (Privateer: Parallel Universe's Home). WC or Privateer Drayman for you?
WCpedia --The Wing Commander Encyclopedia-- From Angel Deveraux through Belisarius to Zachary Banfeld...
WC Nexus forum, the Moonbase Tycho of WC fans.
Latest version of LaGrande noodleworks (scroll down).
An evolving La Grande How-To...
The non-working, but latest, CineMut test_bike
PU (Privateer: Parallel Universe's Home). WC or Privateer Drayman for you?
WCpedia --The Wing Commander Encyclopedia-- From Angel Deveraux through Belisarius to Zachary Banfeld...
WC Nexus forum, the Moonbase Tycho of WC fans.
-
chuck_starchaser
- Elite
- Posts: 8014
- Joined: Fri Sep 05, 2003 4:03 am
- Location: Montreal
- Contact:
Here's some inspiration..
From this website:
http://www.users.globalnet.co.uk/~dheb/ ... Index5.htm
This also:
http://www.users.globalnet.co.uk/~dheb/ ... lowres.jpg
And this:
http://www.users.globalnet.co.uk/~dheb/ ... ncey2L.jpg
And this:
http://www.users.globalnet.co.uk/~dheb/ ... hton2L.jpg
From this website:
http://www.users.globalnet.co.uk/~dheb/ ... Index5.htm
This also:
http://www.users.globalnet.co.uk/~dheb/ ... lowres.jpg
And this:
http://www.users.globalnet.co.uk/~dheb/ ... ncey2L.jpg
And this:
http://www.users.globalnet.co.uk/~dheb/ ... hton2L.jpg
Latest version of Cinemut Opaque
Latest version of LaGrande noodleworks (scroll down).
An evolving La Grande How-To...
The non-working, but latest, CineMut test_bike
PU (Privateer: Parallel Universe's Home). WC or Privateer Drayman for you?
WCpedia --The Wing Commander Encyclopedia-- From Angel Deveraux through Belisarius to Zachary Banfeld...
WC Nexus forum, the Moonbase Tycho of WC fans.
Latest version of LaGrande noodleworks (scroll down).
An evolving La Grande How-To...
The non-working, but latest, CineMut test_bike
PU (Privateer: Parallel Universe's Home). WC or Privateer Drayman for you?
WCpedia --The Wing Commander Encyclopedia-- From Angel Deveraux through Belisarius to Zachary Banfeld...
WC Nexus forum, the Moonbase Tycho of WC fans.
-
chuck_starchaser
- Elite
- Posts: 8014
- Joined: Fri Sep 05, 2003 4:03 am
- Location: Montreal
- Contact:
Hey, Halleck, welcome back. I managed, with help from GAlex getting started, to UV-unwrap the LRC... And I even managed to do a radiosity baking...

Where I got stuck is, I haven't been able to write the radiosity to a texture. I posted twice at elysium and got no useful help. Maybe you can get some of your powerful friends to look at it. The blender file for the radiosity is here:
http://www.deeplayer.com:2082/frontend/ ... adprob.zip
Don't be scared by the polycount; that's there for the radiosity; the texture would then map to the lower poly original.
Latest version of Cinemut Opaque
Latest version of LaGrande noodleworks (scroll down).
An evolving La Grande How-To...
The non-working, but latest, CineMut test_bike
PU (Privateer: Parallel Universe's Home). WC or Privateer Drayman for you?
WCpedia --The Wing Commander Encyclopedia-- From Angel Deveraux through Belisarius to Zachary Banfeld...
WC Nexus forum, the Moonbase Tycho of WC fans.
Latest version of LaGrande noodleworks (scroll down).
An evolving La Grande How-To...
The non-working, but latest, CineMut test_bike
PU (Privateer: Parallel Universe's Home). WC or Privateer Drayman for you?
WCpedia --The Wing Commander Encyclopedia-- From Angel Deveraux through Belisarius to Zachary Banfeld...
WC Nexus forum, the Moonbase Tycho of WC fans.
-
Halleck
- Elite
- Posts: 1832
- Joined: Sat Jan 15, 2005 10:21 pm
- Location: State of Denial
- Contact:
Cool... I'm honestly not concerned about fancy stuff like radiosity baking, but it would be a nice addition to the "hi-def" graphics branch that's accumulating content. If my friends have free time I can ask them to give the mesh a once-over.
What's more important for the next release is getting all these new models unwrapped so they can be given solid-color textures and matte specmaps to round out the "low-def" graphics branch.
EDIT: BTW that wierd link you gave prompted me for a password... this seems to work though:
http://www.deeplayer.com/dan_w/FFE/LRC/LRC5radprob.zip
-
chuck_starchaser
- Elite
- Posts: 8014
- Joined: Fri Sep 05, 2003 4:03 am
- Location: Montreal
- Contact:
Doh!
That was a ...
What's the mouse-click equivalent term for "typo". a "clycko"?
You got it right, tho.
That was my first unwrap, and I'm still very slow at it; but I'll try to do the hi-tech station next. If you don't care for the radiosity baking, I have the file with the original mesh for you; the one in that file is ultra-high poly, very subdivided. But hold on a couple of days; problem is I'm switching deeplayer.com to a new service provider, been transferring files; at the current rate it will take a few more hours, and I don't want to disturb the operation too much, at the moment; then I have to get the dns switched over; and it takes a day or two to happen; meanwhile it will be a limbo situation.
Latest version of Cinemut Opaque
Latest version of LaGrande noodleworks (scroll down).
An evolving La Grande How-To...
The non-working, but latest, CineMut test_bike
PU (Privateer: Parallel Universe's Home). WC or Privateer Drayman for you?
WCpedia --The Wing Commander Encyclopedia-- From Angel Deveraux through Belisarius to Zachary Banfeld...
WC Nexus forum, the Moonbase Tycho of WC fans.
Latest version of LaGrande noodleworks (scroll down).
An evolving La Grande How-To...
The non-working, but latest, CineMut test_bike
PU (Privateer: Parallel Universe's Home). WC or Privateer Drayman for you?
WCpedia --The Wing Commander Encyclopedia-- From Angel Deveraux through Belisarius to Zachary Banfeld...
WC Nexus forum, the Moonbase Tycho of WC fans.
-
chuck_starchaser
- Elite
- Posts: 8014
- Joined: Fri Sep 05, 2003 4:03 am
- Location: Montreal
- Contact:
Here you go:
http://www.deeplayer.com/dan_w/FFE/LRC/LRC5.zip
http://www.deeplayer.com/dan_w/FFE/LRC/LRC5.zip
Latest version of Cinemut Opaque
Latest version of LaGrande noodleworks (scroll down).
An evolving La Grande How-To...
The non-working, but latest, CineMut test_bike
PU (Privateer: Parallel Universe's Home). WC or Privateer Drayman for you?
WCpedia --The Wing Commander Encyclopedia-- From Angel Deveraux through Belisarius to Zachary Banfeld...
WC Nexus forum, the Moonbase Tycho of WC fans.
Latest version of LaGrande noodleworks (scroll down).
An evolving La Grande How-To...
The non-working, but latest, CineMut test_bike
PU (Privateer: Parallel Universe's Home). WC or Privateer Drayman for you?
WCpedia --The Wing Commander Encyclopedia-- From Angel Deveraux through Belisarius to Zachary Banfeld...
WC Nexus forum, the Moonbase Tycho of WC fans.
-
Halleck
- Elite
- Posts: 1832
- Joined: Sat Jan 15, 2005 10:21 pm
- Location: State of Denial
- Contact:
Cool. As you can tell, I'm in no rush. 
For the low-rez pack, I have an art style (as described earlier) that I would like to see throughout the textures, and to some extent, the models. For the high-rez pack... you guys have free rein. Make it as detailed, realistic, greebled, and radiosity-baked as you please, as long as it looks purdy (or ugly in a cool way).
Since that kind of stuff tends to be more time-consuming, however, my priority is to get the low-rez dataset done first so I can make a new release.
BTW, The LRC5 model seems ripe for inclusion in the low-rez pack as is... as far as I can tell, the texture is simple enough to meet my style requirements (though I'll have to see it in-game to be certain). LODs would be nice if possible, though I'm currently incompetent with implementing them. Unwrapping should take priority over LODs though, since I can include non-LODded meshes in a release, but not ones without UV coords.
-
chuck_starchaser
- Elite
- Posts: 8014
- Joined: Fri Sep 05, 2003 4:03 am
- Location: Montreal
- Contact:
Not sure which texture that is, but great to hearHalleck wrote:BTW, The LRC5 model seems ripe for inclusion in the low-rez pack as is... as far as I can tell, the texture is simple enough to meet my style requirements (though I'll have to see it in-game to be certain).
Or, here's a better idea, and very simple:
* Use the specular mask (specularocclusion.jpg) as the specular texture, pretty much as is; or with lowered saturation.
* Use diffuseocclusion.jpg for the diffuse texture, but with lowered contrast; and manually apply about 0.1 alpha on the glass parts (islands on the lower right).
* Then take ambient.jpg, lower its brightness until it's pretty dark, manually add window/engine/whatever lights, and that's your glow map. Should work nicely.
Damn! Forgot to include an LOD. I'll do it this weekend. I might texture it too, like for the other set.LODs would be nice if possible, though I'm currently incompetent with implementing them. Unwrapping should take priority over LODs though, since I can include non-LODded meshes in a release, but not ones without UV coords.
Latest version of Cinemut Opaque
Latest version of LaGrande noodleworks (scroll down).
An evolving La Grande How-To...
The non-working, but latest, CineMut test_bike
PU (Privateer: Parallel Universe's Home). WC or Privateer Drayman for you?
WCpedia --The Wing Commander Encyclopedia-- From Angel Deveraux through Belisarius to Zachary Banfeld...
WC Nexus forum, the Moonbase Tycho of WC fans.
Latest version of LaGrande noodleworks (scroll down).
An evolving La Grande How-To...
The non-working, but latest, CineMut test_bike
PU (Privateer: Parallel Universe's Home). WC or Privateer Drayman for you?
WCpedia --The Wing Commander Encyclopedia-- From Angel Deveraux through Belisarius to Zachary Banfeld...
WC Nexus forum, the Moonbase Tycho of WC fans.
-
Halleck
- Elite
- Posts: 1832
- Joined: Sat Jan 15, 2005 10:21 pm
- Location: State of Denial
- Contact:
I'm not too good with editing textures in that manner (lightening/darkening specific areas) so I might just try first with what we have. It's easy enough to hot-swap textures without changing the mesh anyway.
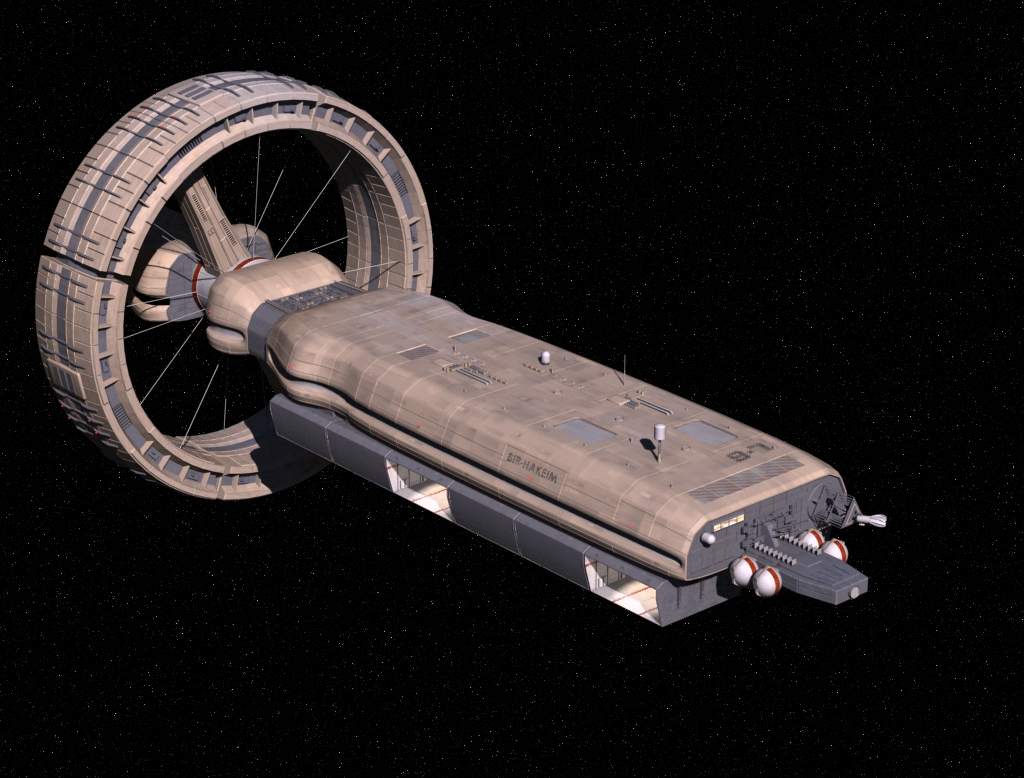
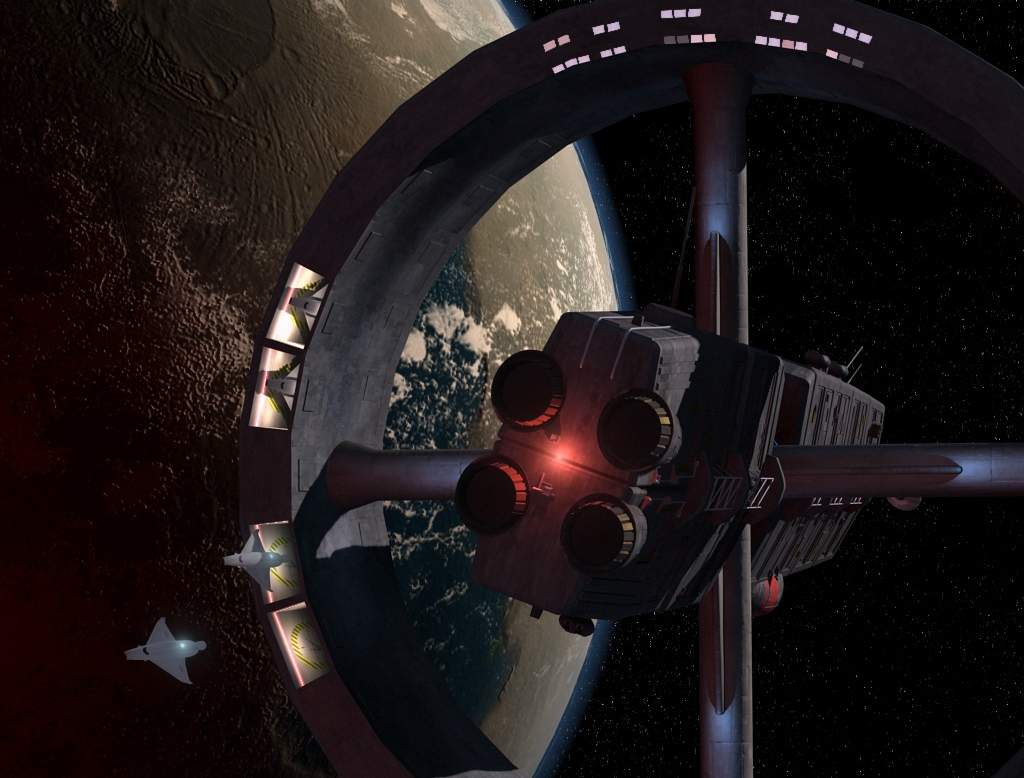
By the way... a newly proposed spacecraft caught my eye:

It may turn out that the original Elite ships are more realistic than the ones found in VS!
By the way... a newly proposed spacecraft caught my eye:

It may turn out that the original Elite ships are more realistic than the ones found in VS!
-
chuck_starchaser
- Elite
- Posts: 8014
- Joined: Fri Sep 05, 2003 4:03 am
- Location: Montreal
- Contact:
Latest version of Cinemut Opaque
Latest version of LaGrande noodleworks (scroll down).
An evolving La Grande How-To...
The non-working, but latest, CineMut test_bike
PU (Privateer: Parallel Universe's Home). WC or Privateer Drayman for you?
WCpedia --The Wing Commander Encyclopedia-- From Angel Deveraux through Belisarius to Zachary Banfeld...
WC Nexus forum, the Moonbase Tycho of WC fans.
Latest version of LaGrande noodleworks (scroll down).
An evolving La Grande How-To...
The non-working, but latest, CineMut test_bike
PU (Privateer: Parallel Universe's Home). WC or Privateer Drayman for you?
WCpedia --The Wing Commander Encyclopedia-- From Angel Deveraux through Belisarius to Zachary Banfeld...
WC Nexus forum, the Moonbase Tycho of WC fans.
-
chuck_starchaser
- Elite
- Posts: 8014
- Joined: Fri Sep 05, 2003 4:03 am
- Location: Montreal
- Contact:
Halleck; I think you might like this texturing for the LRC. Looks retro and pixelated, like 2D hand-paintings in Privateer; while retaining some elements of optical realism, such as a hint of ambient shadowing, and grit that blocks specularity. I'm too tired to test it, haven't slept. I think it should work with a bit of tweaking perhaps.
The glow map provides its own ambient light; so it will look best in a system with ambient light specified as 0,0,0.
www.deeplayer.com/danw/FFE/LRC/LRC7txtrs.zip
This is the best I can do with Blender. atm...

Not sure why it's so hard to render a textured model... No specularity and no emissivity...
EDIT:
Got a little bit of specularity happening, but at the expense of the diffuse texture showing lacking contrast... Anyhow, here's where it's at the moment...

Uhmm... Never mind; too many problems with this model; give me a few more days and I'll get it right.
The glow map provides its own ambient light; so it will look best in a system with ambient light specified as 0,0,0.
www.deeplayer.com/danw/FFE/LRC/LRC7txtrs.zip
This is the best I can do with Blender. atm...
Not sure why it's so hard to render a textured model... No specularity and no emissivity...
EDIT:
Got a little bit of specularity happening, but at the expense of the diffuse texture showing lacking contrast... Anyhow, here's where it's at the moment...
Uhmm... Never mind; too many problems with this model; give me a few more days and I'll get it right.
Latest version of Cinemut Opaque
Latest version of LaGrande noodleworks (scroll down).
An evolving La Grande How-To...
The non-working, but latest, CineMut test_bike
PU (Privateer: Parallel Universe's Home). WC or Privateer Drayman for you?
WCpedia --The Wing Commander Encyclopedia-- From Angel Deveraux through Belisarius to Zachary Banfeld...
WC Nexus forum, the Moonbase Tycho of WC fans.
Latest version of LaGrande noodleworks (scroll down).
An evolving La Grande How-To...
The non-working, but latest, CineMut test_bike
PU (Privateer: Parallel Universe's Home). WC or Privateer Drayman for you?
WCpedia --The Wing Commander Encyclopedia-- From Angel Deveraux through Belisarius to Zachary Banfeld...
WC Nexus forum, the Moonbase Tycho of WC fans.
-
Halleck
- Elite
- Posts: 1832
- Joined: Sat Jan 15, 2005 10:21 pm
- Location: State of Denial
- Contact:
-
chuck_starchaser
- Elite
- Posts: 8014
- Joined: Fri Sep 05, 2003 4:03 am
- Location: Montreal
- Contact:
Halleck, thanks; don't bother putting it into bfxm yet, tho. There are serious problems. One of them is, for some reason, the texture and radiosity bakings don't register exactly with the UV-layout; I had to scale and shift things slightly by hand... I think it happened because after I exported the layout, I found the center of the main mesh was slightly off the 0,0,0 coordinates, and I "fixed" that before generating the bakings. Another problem is I didn't UV-map the greebles, and now I don't know how to deal with them. I think what I'll do is map them all overlapping into a small pile on the texture and give them a flat color. I found some gaps on the mesh also, and some very bad stretchings on the UV-map. I need to take a step back, clean up the mesh a bit, fix the unwrap, and do the texturing over. It will be easier the second time, tho; won't take too long.
I was thinking, I don't really like those round heatsinks; I think I'll throw them away unless you've grown attached to them; as well as the pipes on top and bottom; and only leave the pipes on the sides.
I was thinking, I don't really like those round heatsinks; I think I'll throw them away unless you've grown attached to them; as well as the pipes on top and bottom; and only leave the pipes on the sides.
Latest version of Cinemut Opaque
Latest version of LaGrande noodleworks (scroll down).
An evolving La Grande How-To...
The non-working, but latest, CineMut test_bike
PU (Privateer: Parallel Universe's Home). WC or Privateer Drayman for you?
WCpedia --The Wing Commander Encyclopedia-- From Angel Deveraux through Belisarius to Zachary Banfeld...
WC Nexus forum, the Moonbase Tycho of WC fans.
Latest version of LaGrande noodleworks (scroll down).
An evolving La Grande How-To...
The non-working, but latest, CineMut test_bike
PU (Privateer: Parallel Universe's Home). WC or Privateer Drayman for you?
WCpedia --The Wing Commander Encyclopedia-- From Angel Deveraux through Belisarius to Zachary Banfeld...
WC Nexus forum, the Moonbase Tycho of WC fans.
-
Halleck
- Elite
- Posts: 1832
- Joined: Sat Jan 15, 2005 10:21 pm
- Location: State of Denial
- Contact:
-
chuck_starchaser
- Elite
- Posts: 8014
- Joined: Fri Sep 05, 2003 4:03 am
- Location: Montreal
- Contact:
Okeydoc; that should be easy to do. Unfortunately it will impact framerates to have a lot of overlap, when you're up close to it; --and boolean welding of the greebles to the body is almost out of the question, that's why I thought, best for that would be using a bumpmap. Well, I heard there's a better boolean script available for Blender; might try that...
Latest version of Cinemut Opaque
Latest version of LaGrande noodleworks (scroll down).
An evolving La Grande How-To...
The non-working, but latest, CineMut test_bike
PU (Privateer: Parallel Universe's Home). WC or Privateer Drayman for you?
WCpedia --The Wing Commander Encyclopedia-- From Angel Deveraux through Belisarius to Zachary Banfeld...
WC Nexus forum, the Moonbase Tycho of WC fans.
Latest version of LaGrande noodleworks (scroll down).
An evolving La Grande How-To...
The non-working, but latest, CineMut test_bike
PU (Privateer: Parallel Universe's Home). WC or Privateer Drayman for you?
WCpedia --The Wing Commander Encyclopedia-- From Angel Deveraux through Belisarius to Zachary Banfeld...
WC Nexus forum, the Moonbase Tycho of WC fans.
-
Moodles
- Atmospheric Pilot

- Posts: 1
- Joined: Mon Jun 12, 2006 9:43 am
just a little update, I've been speaking to Halleck on IM, about bringing the old feel of Frontier: Elite II and First Encounters sector viewer into Vegastrike for the Elite Strike.
http://www.jongware.com - With help from Theun, the programmer of the FFEStarSys program, and writer of extensive documentation of the inner workings of the Frontier: Elite 2 & First Encounters game, such as exact positions of predefined systems and how to generate the galaxy randomly the exact same way every time, algorithms and logic etc.
Top left, is my work in progress with only the 0,0 sector defined. Just my OpenGL demonstation, what is most important is the Z-axis positions of the yellow lines which are on the opposite end of the point (star), which match up to Theun's FFEStarSys program on the top right. Also matches up to Frontier: Elite 2 I have in the lower bottom corner, running through DOSBox.
http://fteqw.com/moodles/elite_starmap.png[/url]